Showing posts with label recipes. Show all posts

Wednesday, January 8, 2025

Black-Eyed Pea Grinder Salad

 Black Eyed Pea Grinder Salad

This is an original grinder salad that I modified based on what I had on hand today. I made it with black-eyed peas for a New Year's twist, since in the South where I grew up you always ate black-eyed peas. An original grinder salad would be Italian and made with beans, but my beans are in the pasta because it is made with chickpea pasta. 

Ingredients:
1/2 red onion, chopped
1 red bell pepper, chopped
1 bunch flat leaf parsley, minced
1 box chickpea pasta, 8 oz.
1 can black-eyed peas, 15.5 oz. can
1/4 cup pepperoncini peppers, chopped up
1/2 cup salami or pepperoni, whatever you have chopped in half or quarters
1/4 cup red wine vinegar
1/2 cup good olive oil
2 tsp. oregano
2 tablespoons of lemon juice or juice of one lemon

Instructions:
Cook the box of chickpea pasta according to the directions. Usually after it comes to a boil, you simmer for 8 minutes, then it is done. Drain and chill for 30 minutes to an hour in refrigerator.
Dice the red onion, thinly slice the red pepper, and mince the parsley. Chop your pepperoncini peppers and cut up your salami, or I used pepperoni (whatever Italian meat you have on hand). Rinse and drain your black-eyed peas. Add your peas, onion, peppers, pepperoncini, meat, and parsley to the bowl of cooled pasta. Add the vinegar, olive oil, oregano, and lemon juice and stir until well combined. You could add many things to this. I used the last of the marinated olives from the mezze platter we had this week to it. You could add cherry tomatoes or mozzarella balls or anything you wanted to finish up from another small meal. You can serve right away or chill in the refrigerator. The longer it sets, the better it tastes. 
Enjoy! 
In Victory,
Sherry

Monday, September 30, 2024

Fresh Herb Basket

Fresh Herb Basket
It is time again this month to do an herb project from The Herbal Yearbook. For September, I choose to make a fresh herb basket. It is for giving or for using in your own kitchen. 

Fresh Herb Basket
Pick your herbs and gather your supplies. 
supplies:
basket
3-5 herbs of your choice
damp paper towels
parchment paper
string
recipe card (if giving)
any other items that will go with to give as gift (ex. herb stripper)

Fresh Herb Basket
I have gathered my herbs: rosemary, marjoram, oregano, thyme, and sage. I am taking the cuttings of my herbs and wrapping the lower stem with the damp paper towel. 

Fresh Herb Basket
After securely wrapping the stems, I place a square of parchment paper around the end of the herb. I have it folded here down in triangles on each top corner. Just like your making a paper airplane. 

Fresh Herb Basket
I wrap the parchment paper completely around the damp paper towel and twist the bottom.

Fresh Herb Basket
Then I flip the twisted part up and behind and then tie with twine.

Fresh Herb Basket
When finished, it looked like this. My grandmother showed me how to do this when I was small so I could take the flowers I picked home.

Fresh Herb Basket
The book I am using for the craft idea suggests giving this as a gift. If you have friends that are foodies and like to cook with fresh herbs, this is a great idea. 

Fresh Herb Basket
This is how my basket looked when finished. I added a card with an idea of making herbs de Provence, herb scissors, and an herb stripper. I am saving my herbs for a project for next month. 

The Herbal Yearbook Book
I have really enjoyed making projects from this book to gain more knowledge and practice using my herbs. Do you have herbs you use from your garden?

In Victory,
Sherry

Friday, March 1, 2024

Small Batch Chocolate Cupcakes

 Small Batch Chocolate Cupcakes
I have recently discovered small-batch baking. I saw this last week on a YouTube channel I follow. The lady makes all small servings for her recipes. We have fewer people in the house now, and we really don't need 24 cupcakes when we make them. 

Small Batch Chocolate Cupcakes
I was really impressed with this recipe. It came out exactly like it was supposed to. The only changes I made to the recipe were that I used 1/2 teaspoon vanilla in the cupcake batter and I sifted the powdered sugar for the buttercream icing recipe. They turned out fantastic!! There are only three pictured above because one has already been eaten! 
Enjoy!

In Victory!
Sherry

Friday, February 23, 2024

DIY Ice Cream Cake

DIY Ice Cream Cake
Making your own ice cream cake couldn't be easier. Give yourself a day or maybe two to make it because you will need to freeze in between the ice cream layers before proceeding to the next step. 

DIY Ice Cream Cake
Ingredients:
Cake:
1 carton of vanilla ice cream (around 6 cups)
1 carton of second flavor ice cream. (I used chocolate chip.) (also around 6 cups)
1 1/4 cup of chocolate crumbs for baking (can make these out of Oreos)
12 ounce jar of Smucker's Chocolate Fudge Sauce

Icing: Stabilized Whip Cream :
2 cups of heavy whipping cream
4 tablespoons powdered sugar
1 tablespoon cornstarch
1 teaspoon vanilla extract
sprinkles (optional)

Your first step is to pick out a pan and line it with parchment paper, especially on the bottom. I also layered the sides. Then pick out your first ice cream flavor and leave it on the counter for 20-30 minutes till it has the consistency of soft serve like in the picture above.

Ice Cream Cake
Once everything is ready, spoon your softened ice cream into your prepared pan. I am using a 9-inch cheesecake pan lined with parchment paper. Then smooth it out on top like icing a cake. Put this in the freezer and let it harden about 30 minutes or more.

Ice Cream Cake
Next, pour your cookie or chocolate crumbs over your cake top. Cover it completely. 

Ice Cream Cake
Next, warm your fudge sauce in the microwave for about 20 seconds with the lid off. Then pour this over your cookie crumb layer and smooth it out again, like icing a cake. 

Ice Cream Cake
Put the whole cake in the freezer again for at least 30 minutes. While this is hardening up, take out of the freezer your second flavor of ice cream and leave it on the counter for 30 minutes.

Ice Cream Cake
When the second ice cream is spreadable, take your cake out of the freezer and smooth the other ice cream out like icing a cake. I had more like 4 cups of ice cream in the second layer. It wasn't a tall enough pan to make it with the whole 6 cups of the second flavor of ice cream. Then put it all in the freezer and harden it for at least 30 minutes or more.

DIY Ice Cream Cake
Here is the finished ice cream part of the cake, but we still want to ice it.

DIY Ice Cream Cake
Now make the stabilized whip cream. Add the cream to a large bowl and, use a hand mixer or stand mixer, stir in the powdered sugar slowly. On medium speed, whip the cream till it forms soft peaks. Slowly add the remaining ingredients until it is incorporated and it whips up to hard peaks, and you are ready to ice the cake.
The cake above has been iced with stabilized whip cream. You can stop here and serve, or you can pipe on with an icing bag and tips and make a decorated cake. I decorated my cake with an open star tip on the edge of the cake and at the base, and then I applied chocolate sprinkles.

DIY Ice Cream Cake
One tip is to clean the knife off after cutting each slice. This will give you a nice, clean slice of cake; there will be no chocolate sauce smeared down the sides.
Store it in the freezer until eaten, which won't take long. 
I noticed that this cake is way easier to cut than a DQ cake. It was also about $20 cheaper! How did it taste? The children said it tasted just like a DQ cake. Win win! 

In Victory!
Sherry

Friday, February 16, 2024

Things I Don't Buy Anymore

 Sourdough Bread
I have been wanting to make this post where I go over all the things I no longer buy at the grocery store. I was really surprised that when I found all the items, there were a lot more than I thought. I have shifted to making a lot of this because of health reasons, but it is also cheaper to make this food at home.  
The first thing I no longer buy is bread. This is my sourdough sandwich bread. It has way fewer ingredients than the store bought. It is better for you too. I did buy a loaf of sourdough at the store when we were short on time one week, and I brought the loaf home and compared it to my bread, and the two loaves looked the same. It is a winner, and it makes up so easy in the bread maker.
*Note: If sourdough is not your favorite bread. I do like this recipe also, and it turns out a wonderful grocery store style white sandwich bread.
Homemade Ranch Dressing
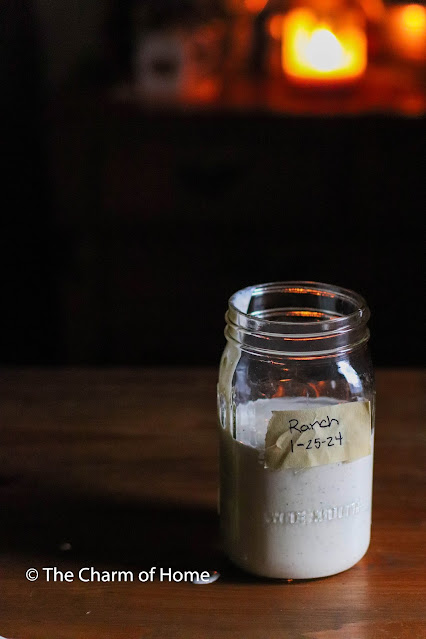
Ranch dressing: The quality of ranch dressing in the bottle was just starting to bother me. Especially when my family pours so much of it on their food. So I took a new turn and decided to make it. It has been a success, and the family loves it.

Homemade Biscuits
Biscuits: It has been a few years since I bought a can of biscuits. They are really easy to make, and, oh, so good! 

Cream of Mushroom Soup
Cream of mushroom soup: You can also make this into any "cream of" soup. It really has a nice texture and works well in recipes too. 
*Note: Updating as of 10/14/24. I will also keep the "cream of" soups from the grocery store in my pantry after watching the events of this season's hurricanes.

Home Made Muffins
Muffins: I took a day a few months ago and made it a muffin baking day. I then froze most of them. We have been unthawing these muffins and using them for breakfasts or snacks. They froze so well, I couldn't tell I hadn't just baked them. I wasn't expecting that!

Cinnamon Rolls
Cinnamon rolls: Okay, need I say more! Fresh cinnamon rolls can be made in an hour. They are delicious, and the free smells related to this activity make it so worthwhile!! 

Home Made Pizza Dough
Frozen pizza dough: You can do a lot more with pizza dough than just make pizza. It is so easy to make and put in the freezer. I always have pizza dough ready to go.

Home Made Pizza
Pizza: I no longer buy frozen pizzas. I used to buy about 12 a week! We started making pizza and haven't looked back. It is way healthier and easy to do.  
*Note update: I do also still buy the occasional grocery store frozen pizza, at my husband's insistence, when I am canning and gardening a lot. I went for a year or more without buying these pizzas, but sometimes you need a quick meal.

Cheese Sticks
Cheese sticks: These are garlic cheese sticks. You could make plain ones. They work well for picky children and adults alike and go great with pizza. Dip them in marinara or ranch! 

Home Made Cranberry Sauce
Cranberry sauce: No more jellified cans of cranberry sauce for my family. I make this from scratch and can it so it is available for a side anytime we want to eat it.

Home Made Pie
Pie: I quit buying store pies a while ago. They are expensive, and I just fell out of the habit of getting them. We only eat about one a month, and it is no trouble to make them. 

Home Made Brownies
Brownies: We used to buy the kids a lot of brownies, and I just make them now. It is a one-bowl and bake item that is so easy and fresher than the boxed, ready made brownies.

Chocolate Chip Cookies
Cookies: I have made more chocolate chip cookies than anything else for the blog. It has always been my one weakness! I usually don't buy them anymore. I always have the ingredients on hand and can make a batch really fast.

Apple Butter
Fruit jams and butters: I made a lot of jam this winter. I canned them all, and I still haven't gotten around to sharing them on the blog. I made so many that I now think I will just share our favorites. More on that soon. 
So I challenge you to make some of these items at home and forgo the convenience for healthier food. I included links to each food item in the text. They link back to my Victory Cottage cookbook. I share all my recipes for free on the link to this page at the top of the blog. 
Let me know if you make any of these items too! 
*Disclaimer: You have to do what is right for you and your family. Since I wrote this post, I have found legitimate reasons to stock the grocery store versions of these made from scratch items. It goes on a month-by-month basis at our house. In the winter I cook more, and in the summer I will get in the garden more.

In Victory!
Sherry

Tuesday, February 13, 2024

Homemade Ranch Dressing

 Homemade Ranch Dressing

I have a growing list of food items I am trying not to buy at the grocery store anymore. One of those items is ranch dressing. Our house is a house of salad eaters. We eat salads year-round and really enjoy ranch dressing on them. I have just recently found this recipe. It was a viral Tik Tok recipe, I don't have the source because I am not on Tic Tok, it was posted to Pinterest with no reference. 

Homemade Ranch Dressing
The recipe includes store bought mayo and I would really like to replace that with my own homemade mayo, but it won't last two weeks in the refrigerator like this, so I am still thinking about that.

Homemade Ranch Dressing
Ranch Dressing

Ingredients:
1/2 cup good mayo (I use Dukes)
1 cup sour cream
1/2 cup full-fat (whole) milk
1/2 teaspoon dill weed
1/2 teaspoon dried parsley
1/2 teaspoon black pepper
1 teaspoon salt
1 teaspoon onion powder
1 teaspoon garlic powder
2 tablespoons lemon juice ( I use bottled unless, I need to use up lemons.)

Whisk together in large mixing bowl and store in a mason jar in refrigerator for two weeks.
Be sure and label with expiring date when you make it. 
Yield: around two cups ( 1 pint)

Homemade Ranch Dressing

Homemade Ranch Dressing
This is our "house" salad here at The Charm of Home. We eat these with pizza or a entrée that needs a vegetable side. 
Side Salad
Ingredients:
lettuce to fill a small plate
cherry tomatoes, cut in half
croutons, homemade or store bought
ranch dressing
grind some fresh black pepper on top

Enjoy!
In Victory,
Sherry

Monday, December 18, 2023

Ginger and Molasses Cake with Molasses and Cinnamon Frosting

Ginger Cake with Molasses Frosting
Today I am sharing a seasonal cake that my family loves. I first baked this in July. I was testing its appeal, and I had no trouble getting the family to eat it even in July. 

Ginger and Molasses Cake with Molasses and Cinnamon Frosting

You give the cake an overnight rest before frosting, and it is marvelously sticky and still frosts great. It slices and serves even better! I just loved how this cake turned out. 


Ginger and Molasses Cake with Molasses and Cinnamon Frosting
Yield: 1 loaf

Ingredients:
1 1/2 cup all purpose flour
1 teaspoon baking soda
2 teaspoons ground ginger
1 3/4 teaspoon cinnamon
1/4 teaspoon nutmeg
1/4 teaspoon allspice
1/2 cup butter, room temperature
1/2 cup molasses
1/2 cup corn syrup (I used dark.)
1/2 cup packed brown sugar
1 cup whole milk
1 egg

Frosting:
4 oz. cream cheese
1/4 cup buttered, softened
1/2 teaspoon vanilla
1 1/2 cup powdered sugar
3 teaspoons molasses
1/4 teaspoon cinnamon

Instructions:
Preheat oven to 350°F and butter a 9x 5 loaf pan. Line it with parchment paper after buttering.
In a medium bowl cream butter and brown sugar with a mixer. Then whip in molasses, corn syrup, milk, and egg. In another large bowl measure out flour, baking soda, and all spices and give it a stir to incorporate. Mix the wet ingredients to the dry, and mix till all incorporated. Pour into prepared baking dish and bake for 45 minutes or until toothpick comes clean. Let the pan cool completely.  Once cooled, remove from pan and wrap the whole loaf in foil for one day so the top gets sticky. Store in an airtight container.

For the Frosting:
Ina a medium mixing bowl, beat the cream cheese and butter together until creamy. Add vanilla and cinnamon and mix well. Slowly add the powdered sugar and beat until creamy. Mix molasses into mixture and blend till well incorporated. Refrigerate frosting until chilled and then frost cake once it has sat overnight. I like my frosting a little warmed up, so I make it the next day when ready to frost the cake and it spreads better.
Recipe adapted from: Great Grub Delicious Treats

Ginger and Molasses Cake with Molasses and Cinnamon Frosting

Ginger and Molasses Cake with Molasses and Cinnamon Frosting
Enjoy!
In Victory,
Sherry
Joining Sarah: at Classical Homemaking for The Homemaking Party

Thursday, December 14, 2023

Cranberry Sauce

Cranberry Sauce
Every year, when the fresh cranberries come to the grocery stores, I buy up a supply of them and make this homemade cranberry sauce. I can it and keep it on the shelf for when the need arises and we want some. 

Cranberry Sauce
Cranberries are one of my favorite things to can. They set up perfectly and look so good when served compared to their jelled store-bought cousins. 

Cranberry Sauce
From Scratch Cranberry Sauce 
Yield 2 cups

Ingredients:
1 tablespoon orange zest
3/4 cup orange juice (juice of 2 large navel oranges)
1/2 cup honey
12 oz. whole fresh cranberries

In a medium sauce pan over medium high heat combine the orange zest, orange juice, and honey. Reduce the heat to low and gently simmer and stir in the cranberries. Cook the berries until they burst, about 15 minutes. Spoon the sauce into a half pint jar and refrigerate for up to 6 hours, then serve. OR:I hot water bath can mine with the hot pack method and spoon the sauce into a half pint mason jar with 1/4-1/2 inch headspace and then process 15 minutes in a boiling water bath. Take the canner off of the heat when done and let the jars sit in the canner for 5 minutes then remove them to counter to be undisturbed for 24 hours. Check seals and store for a year on shelf. Half pint yield: 4 jars
Recipe from: The Prairie Homestead Cookbook
Canning information from: Putting It Up with Honey

In Victory,
Sherry

Friday, December 8, 2023

Brambly Hedge Winter Tea

 Brambly Hedge Winter Tea

It is getting nippy. When the wind blows, you can tell that winter won't be far behind. I pulled out my Barmbly Hedge winter tea set today to have a little tea. I don't have the teapot, but this white one works nicely.

Brambly Hedge Winter Tea
Cozy scenes of Crabapple Cottage with Mr. and Mrs. Apple by the fire. The cottage smells of pies baking, but outside, the blackberry vines have long since lost their fruit. 

Brambly Hedge Winter Tea
When the first snow comes what are mice to do? Make a snowmouse, of course. A little snowmouse is on the teacup and the saucer.

Brambly Hedge Winter Tea
Mrs. Apple by the fire with her freshly baked pie. 

Larder Dish Cupboard
Taking inspiration from the Brambly Hedge kitchens, I styled my cottage cupboard like the story. Jars of cranberry sauce and jam line the top shelf. The middle shelf has spices, a honeypot, and an acorn squash. The bottom shelf has more spices, a loaf of freshly baked bread, acorns in a wooden bowl, and recipes to keep the cook busy. 

Brambly Hedge Winter Tea
Here, the cupboard is restyled again for the final tea setup. Lots of tea lights shimmering in the cupboard, just like the mice live there, and the sun has just set.

With tea today, I am serving a sugar cookie with sprinkles and an oatmeal chocolate chip cookie. This is the family's all-time favorite chocolate chip cookie.

Brambly Hedge Winter Tea

It has begun to snow. "After supper, the children were sent off to bed, but they were far too excited to sleep." The mice children pictured on the backside of the teacup looking out of the window at the snow.

Have you had a first snow yet where you live? We have not had one here yet.

In Victory, 
Sherry