Showing posts with label bake ware. Show all posts

Wednesday, November 9, 2016

Cream Cheese Cranberry Nut Bread

Cream Cheese Cranberry Nut Bread: The Charm of Home
This delicious recipe was my treat with tea this week.  This bread really almost has the ratio of a pound cake.  With a cup of butter and a full 8 ounce package of cream cheese it is moist and satisfying. 

Cream Cheese Cranberry Nut Bread: The Charm of Home
Ingredients:
1 cup butter, softened
1 8 oz. package cream cheese, softened
1 1/2 cup sugar
2 teaspoons vanilla
4 eggs
2 cups flour
1 1/2 teaspoons baking powder
1/2 teaspoon salt
2 cups fresh cranberries
1/2 cup chopped pecans
  1. Preheat oven to 350° F.
  2. In a large mixing bowl cream together butter, sugar, cream cheese, and vanilla.  Mix with a paddle attachment for 2 full minutes. 
  3. Add eggs one at a time beating after each addition. 
  4. In another bowl combine flour, baking powder, and salt. Mix dry into wet slowly and fold in the cranberries and the nuts. 
Grease a 9" x 5" loaf pan.  Pour batter in pan(s). Bake at 350°F for 45 minutes. Check with toothpick and see if it comes out clean.  I had enough after creaming the butter (it was whipped) and sugar that it made another pan (7 3/8" x  3 5/8" x 2 1/4 ") That is a smaller loaf pan that makes 3 cups of batter.  A smaller pan would only need 35 minutes.  
Cool on a wire rack and then turn out and serve. 
Here is handy link to give you an idea about what loaf pans to use: The Low-Down on Loafs Pans: What Size and Kinds?
Recipe adapted from: Julie's Eats and Treats

Enjoy!
Sherry

Monday, September 15, 2014

Chunky Apple Walnut Cake with a Caramel Glaze

I am rounding out my apple recipes today with this Chunky Apple Walnut Cake with a Caramel Glaze.  I used a vintage tube cake pan and it was smaller than the recipe called for so, I had enough of the batter to make a small loaf pan full also.  The vintage tube pan measured 8 1/2 inches across ( The recipe called for a 10-inch tube pan) and the loaf pan was 7 3/8 x 3 5/8 x 2 1/4.  I am telling you this because the cake came out wonderful in the loaf pan also.  

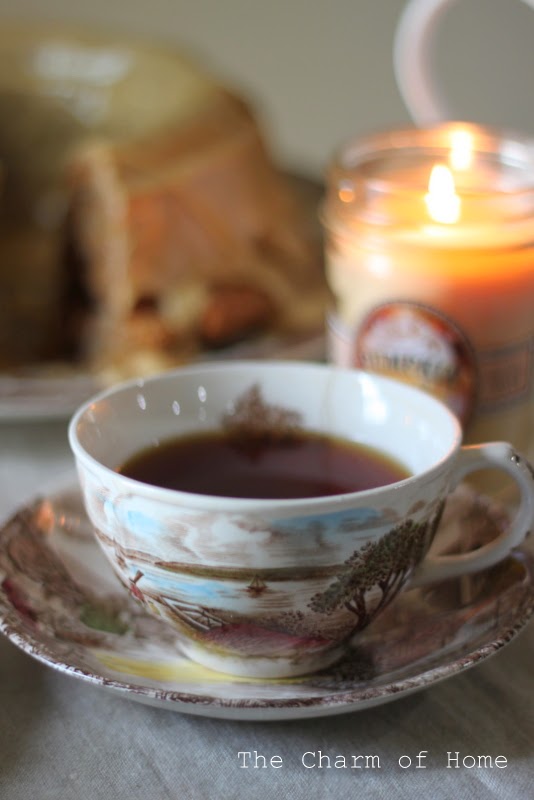
We are celebrating the arrival of fall here this week so, by all means, light some fall candles and make your self a pot of tea or coffee to enjoy the transition into this season! Make your tea a ritual of calm, something you truly enjoy.

I always have to get some seasonal candles at this time of the year.  I found these at Bath & Bodyworks.  They didn't compensate me for this post in anyway, but I have to tell you they smell really good!  The Caramel Pumpkin Swirl was my favorite!!  It smelled as good as the caramel glaze I made for this cake.  The whole kitchen was smelling like a candy kitchen!

All of my transferware have the same colors but, none of it matches.  The cup has no name on it and I am not sure of the pattern.  It is marked 'Made in England.'  The saucer is Olde English Countryside by Johnson Brothers, the slice of cake is on His Majesty by Johnson Brothers, and the cake itself is on Asiatic Pheasant by Royal Stafford.

This cake is a perfect fall recipe.  It is moist, full of bites of apples, and bits of walnuts.  Just the right amount of richness, sweetness, and chewiness to pair with a steaming cup of coffee or tea when there is a chill in the air.  

Ingredients:
1 1/2 cups oil (I used canola)
2 cups granulated sugar
3 large eggs
3 cups all-purpose flour
1/4 teaspoon ground cloves
1 1/4 teaspoon ground cinnamon
1/4 teaspoon nutmeg
1 teaspoon baking soda
1 teaspoon salt
1 1/2 cups shelled walnuts, coarsely chopped
3 cups peeled, coarsely chopped Gala apples
3 tablespoons apple rum

Caramel Glaze:
1/4 cup butter. cut into pieces
1/2 cup light brown sugar, packed
1/4 teaspoon salt
1/3 cup heavy whipping cream
1 cup confectioners sugar, sifted


Preheat the oven to 325 degrees F.
Butter and flour a 10-inch tube pan.
In a large bowl, beat oil and sugar until thick and opaque.  Add eggs, one at a time, beating well after each.  In another medium to large bowl mix flour, cloves, cinnamon, nutmeg, baking soda, and salt.  Add to oil and egg mixture until well blended.
Add walnuts, apple chunks, and rum all at once and stir until pieces are evenly distributed.  
Pour batter into a 10-round tube pan.  Bake for 1 hour and 15 minutes or until toothpick comes out clean.  
Let the cake rest for 10 minutes, then unmold and let cake cool completely.  

Glaze:
In a saucepan over medium heat melt butter, brown sugar, cream and salt. Bring to a full rolling boil over medium heat.  Boil hard for 1 minute.  Remove from heat and let set for 10 minutes.   
Beat in confectioners sugar until smooth.
Immediately pour glaze over the cake. 

Recipe Source:  adapted from The Silver Palate Cookbook. 

Sherry
I will link this to:
  
Tea Time Tuesday at Rose Chintz Cottage 
A Return to Loveliness  at A Delightsome Life 
Tea Cup Tuesday at Martha's Favorites
Tea Cup Tuesday at Artful Affirmations
Tuesday Cuppa Tea at Antiques and Teacups 
Friends Sharing Tea at Bernideen's Tea Time Blog 
Rooted in Thyme Simple and Sweet Fridays
Wow Us Wednesday at Savvy Southern Style

Inspire Me Tuesday at A Stroll Thru Life
Tweak It Tuesday at Cozy Little House
Show and Tell Friday at My Romantic Home
Feathered Nest Friday at French Country Cottage
Say G'Day at Natasha in Oz
Cottage Style Party at Lavender Garden Cottage 
Share Your Cup Thursday at Have a Daily Cup of Mrs. Olsen
Your Going to Love it Tuesday At Kathe with an E
Project Inspire at Cupcakes and Crinoline
The Scoop at Confessions of a Plate Addict
Weekends are Fun Party at Oh My Heartsie Girl
Time Travel Tuesdays at Brambleberry Cottage
Wake Up Wednesday at Sew Crafty Angel
Apple Link Up at I-Lost in Austen   

Tuesday, August 12, 2014

Beachy Cupcakes

I am wrapping up my summer baking with a few more projects and then I am moving onto fall!  But, before we enjoy the fall I wanted to share with you these beachy cupcakes I made this week.  There isn't a recipe, just more or less assembly instructions.  I used a ready-made butter pecan cake mix and made the cupcakes.  

Here is the frosting I used in caramel flavor to make the icing look like sand.  I hand sprinkled brown sugar on top of the frosting to make the top of the cupcake look even more like sand.

To top off the cupcake I made a white chocolate shell with this mold from my sponsor Wholeport.com.  This silicone food grade mold worked perfect with the chocolate and it is easy to use and clean up in the dishwasher.

Oh, how I wished I lived close enough to a beach to go sink my toes in the sand one more time before sweater weather!   Enjoy what's left of summer!

Thank you to my Sponsor Wholeport.com for providing the shell baking mold.
Sherry
I will link this to:

Foodie Friday at Rattlebridge Farm
Strut Your Stuff Saturday at Six Sisters Stuff 
Homemaking Linkup at Hope In Every Season 
The Best Blog Recipes link party 
Anything Goes Party at Bacon Time with the Hungry Hypo
Sweet and Savoury Sunday at Baking in Pyjamas
Wake Up Wednesday at Oh! My Heartsie Girl
Tickle My Taste Buds Tuesdays at Lori's Culinary Creations
Fridays Unfolded at Nancherrow
Home and Garden Thursday at A Delightsome Life

Thursday, June 19, 2014

Home Sweet Home #174

Hello and welcome to Home Sweet Home!  This week I had to share the most gorgeous home and garden with you from the latest issue of Martha Stewart Living in Eat, Plant, Love...Check It Out.

I had a long wanted to make these sweet treats for tea, which I did, in this post Madeleines.

There are so many beautiful homes and creative ideas at the Home Sweet Home party each week!  Here are a few that caught my eye from last week.

Martinel, of the blog by the same name, has made these Kitchen Canisters that are hand decorated with nautical knots in relief for summer.  They are really gorgeous! 

Suzan at Simply Vintageous shared a fabulous beach house with us in her "I Wanna Live There" series.

Deb at Lake Girl Paints shared this fabulous Coffee Sign she hand painted for the entry!

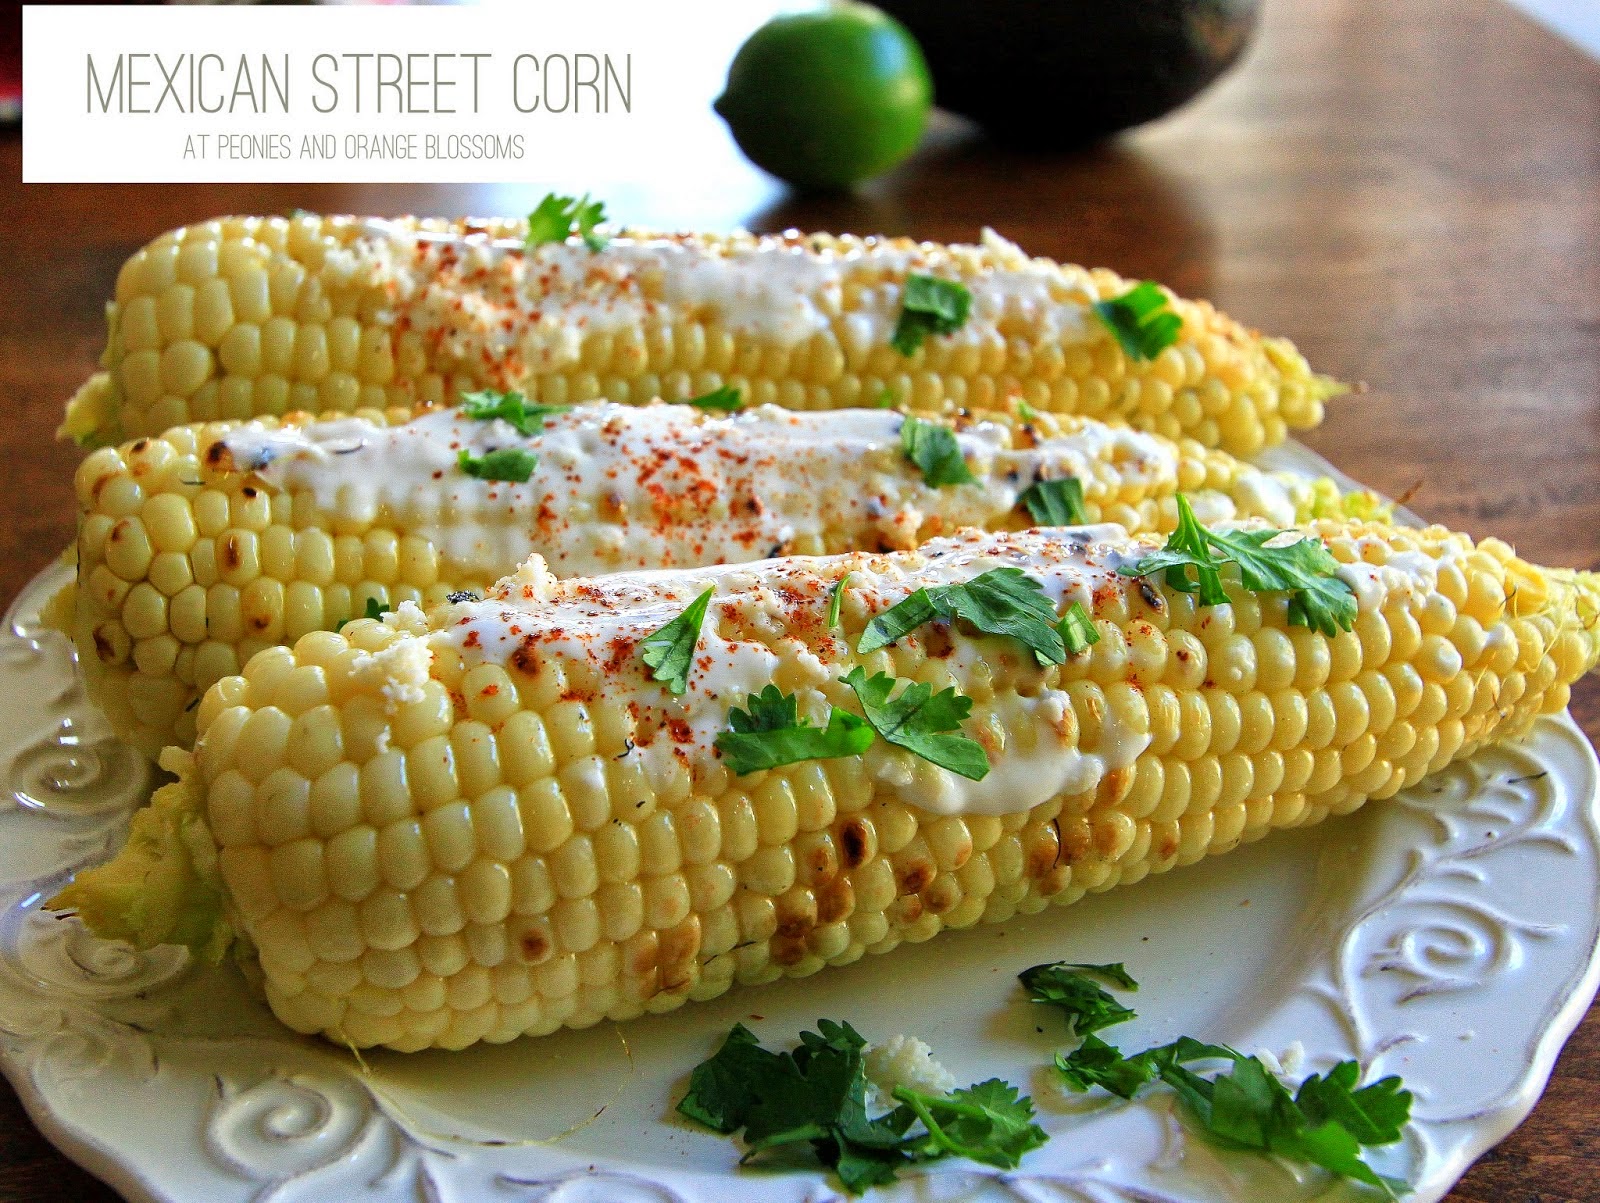
Angelina at Peonies and Orange Blossoms shared this delicious looking Mexican Street Corn.

Marty, at A Stroll Thru Life, shared Yvonne's lovely dining room makeover in her "Putting It All Together" series.  Gorgeous room! 

I am really lucky to have all of your amazing posts because, it is you who make the Home Sweet Home party so special!  You are all so talented and share such wonderful posts!  It is really hard to feature a few and, remember to be featured you must have a link back to the Home Sweet Home party.   Thank you to everyone who joins me at Home Sweet Home!  It is wonderful to have you here!

Sherry

Follow me on Twitter 

Follow me on Facebook

Follow me on Pinterest

Follow me where I really enjoy the visual aspect of blogging  Tumblr

Guidelines for Home Sweet Home Party: 
Attention: To link up you must have a permalink back to this party in your post or you won't be featured.
Link up anything in your home or garden.  I love seeing home tours and neat shops too!
My button is on my sidebar for the party, if you want to use it.   If you are new here I hope you will become a follower. Please don't link up more than two posts.  No Etsy link ups or direct advertising, please.  Please visit some of the other blogs and get some great inspiration.  Thanks.:)
Now let's see your beautiful homes, delicious recipes, crafts, or whatever makes your home special!

 *If you are pinning a post submitted here, please pin from the original source.

Tuesday, June 17, 2014

Madeleines

The Charm of Home: Madeleines
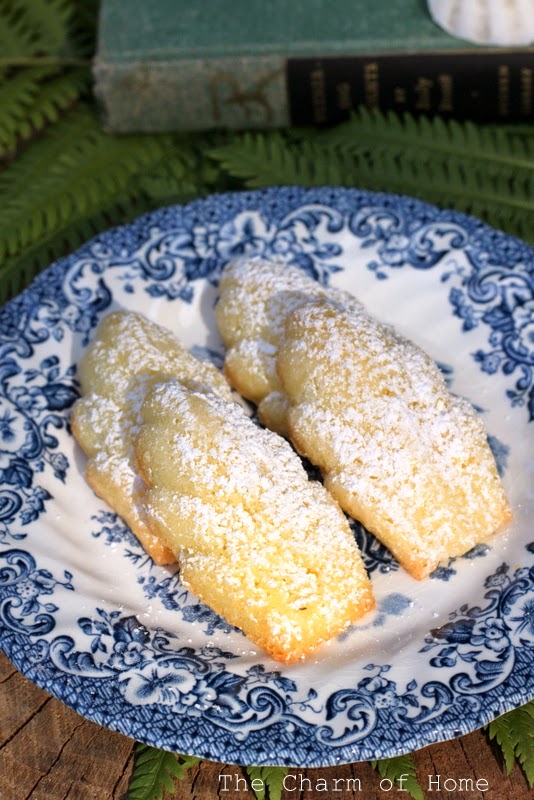
I have long wanted to make madeleines.  The madeleine is a small cake originating from the northeastern region of France.  Madelines are very small sponge cakes with a distinctive shell-like shape acquired from the shape of the pan they are baked in.  I was so lucky that my sponsor Wholeport happen to have a fabulous madeline silicone baking pan.  


The Charm of Home: Madeleines
The madeleine baking mold was of food grade silicone and was a breeze to use and easy to clean up.  The cakes popped right out of the mold to make these delicious and beautiful tea cakes.  I was so happy with the performance of that mold!


For the recipe for the madeleines I turned to my new favorite cookbook Beach House Baking: An Endless Summer of Delicious Desserts. by pastry chef Lei Shishak.  The madeleine is a shell shaped petite cake that is perfect and light for your summer menu.

The Charm of Home: Madeleines

Madeleines

Ingredients
1/4 cup all-purpose flour for coating pan
3 large eggs
1/2 cup sugar
1 teaspoon finely grated lemon zest
1/2 teaspoon pure vanilla extract
3/4 cup cake flour, sifted
3/4 teaspoon baking powder
6 tablespoons (3/4 stick) unsalted butter, melted and cooled slightly

Preheat the oven to 350 degrees.  Grease the Madeleine molds with pan spray and gently sift flour evenly over the molds.
In a bowl of an electric mixer fitted with the whip attachment, beat the eggs, sugar, lemon zest, and vanilla on high speed for 3 minutes until thickened and yellow.  Add the flour and baking powder and mix on low speed until combined.  Remove bowl from mixer and fold in the melted butter with a rubber spatula.  
Fill each mold with the batter.  Use a mini offset spatula to spread the batter out.
Bake for 8-10 minutes or until tops are set.  Do not overbake.

*Note- I substituted the butter with canola oil.  I have a son who recently has developed a milk allergy.  The canola worked perfectly in this recipe.  I also dusted the cakes with confectioners sugar.

The Charm of Home: Madeleines
Here is the cake without the powdered sugar.  You can see how nicely the mold shaped them.

Recipe reprinted with permission from Skyhorse Publishing, Inc.
A copy of this cookbook was provided to me for this post.
Beach House Baking is available now from Skyhorse Publishing. 

The Charm of Home: Madeleines
The transferware is by Johnson Brothers the pattern is Coaching Scenes.
Thank you to Wholeport.com for sponsoring this post!
  Sherry
I will link this to:
  
Tea Time Tuesday at Rose Chintz Cottage 
A Return to Loveliness  at A Delightsome Life 
Tea Cup Tuesday at Martha's Favorites
Tea Cup Tuesday at Artful Affirmations
Tuesday Cuppa Tea at Antiques and Teacups 
Friends Sharing Tea at Bernideen's Tea Time Blog 
Inspire Me Tuesday at A Stroll Thru Life
Tweak It Tuesday at Cozy Little House
Show and Tell Friday at My Romantic Home
Feathered Nest Friday at French Country Cottage
Say G'Day at Natasha in Oz
Cottage Style Party at Lavender Garden Cottage 
Share Your Cup Thursday at Have a Daily Cup of Mrs. Olsen
Encouraging Homemakers Link Party at Living From Glory to Glory
Wow Us Wednesday at Savvy Southern Style

Foodie Friday at Rattlebridge Farm 
Strut Your Stuff Saturday at Six Sisters Stuff 
Homemaking Linkup at Hope In Every Season 
Rooted in Thyme Simple and Sweet Fridays
The Best Blog Recipes link party 
Lou Lou Girls Fabulous Party
Table It! at Rustic & Refined
Creative Ways link party at Posed Perfection
Your Going to Love it Tuesday At Kathe with an E
Project Inspire at An Extraordinary Day
Anything Goes Party at Bacon Time with the Hungry Hypo
Sweet and Savoury Sunday at Baking in Pyjamas
What I Made Yesterdayat Oh! My Heartsie Girl
Tickle My Taste Buds Tuesdays at Lori's Culinary Creations
Fridays Unfolded at Nancherrow
Lou Lou Girls Fabulous Party

Wednesday, April 9, 2014

Making a Chocolate Cross for Easter

Making Homemade Chocolates for Easter
Making really beautiful treats for Easter has never been easier with the chocolate/soap molds available at Wholeport.com  The mold I used was the 2-hole translucence silicone cross mold. 
Making Homemade Chocolates for Easter
All I did was take some of my favorite chocolate chips from the grocery and melt them according to package directions.  I then used a cake icing spatula and scooped the chocolate into the mold and scrapped it flat when the cavity was filled.  I then put the mold into the freezer and waited about 30-45 minutes.  The silisone lets you easily pop the chocolate right out without breaking it.  The molds worked perfect everytime

Making Homemade Chocolates for Easter
This was such a fun project for Easter.  Don't forget to also get gift bags for your chocolate creations, also available at Wholeport.  The gift bags made the perfect packaging to tuck my newly made treats right into the Easter basket!

Sherry
I will link this to:
Foodie Friday at Rattlebridge Farm 
Strut Your Stuff Saturday at Six Sisters Stuff 
Homemaking Linkup at Hope In Every Season 
Rooted in Thyme Simple and Sweet Fridays
The Best Blog Recipes link party 
Tasty Tuesday at The Comforts of Home

Wednesday, November 20, 2013

Making Cookies with a Mold (Sugar Coookies)

I have been wanting to try making cookies with a mold for a long time.  So the understated sugar cookie got a makeover at my house this week with a sunflower baking mold from my sponsor Wholeport.  I really loved how these cookies turned out!  Talk about elegant and something new at the holiday table, these were perfect!

I used my long time favorite sugar cookie recipe from Martha Stewart with a few changes I have made.
Recipe adapted from: The Martha Stewart Cookbook

Ingredients:
 2 cups of all-purpose flour
1/4 teaspoon salt
1/2 teaspoon aluminum free baking powder
1/4 pound (1 stick) butter, softened
1 cup sugar
1 egg
2 tablespoons of Hazelnut Kahlua (optional)
1/2 teaspoon vanilla extract

Technique:
Sift together the dry ingredients.  In an electric mixer, cream butter, sugar, until well mixed then add the egg, Kahlua, and vanilla and continue mixing until light.  Add the dry ingredients a little at a time and mix until well blended.    

Wrap and chill dough for at least 30 minutes. You cannot skip this step, with the mold you must chill the dough.  Preheat the oven to 400 degrees.

The cookie mold design, the holder it fits in, the rolling pin, the work surface all must be lightly floured.  All work surfaces must stay lightly floured between each cookie.   Roll out the dough to about 1/8 and inch.  When you insert the design disk in the baking mold holder and press down, press hard with this handle I am holding onto in this picture and give it a tiny twist, like you are making biscuits.  Make sure you have gotten to the work surface with your effort.  Then push down on the spring loaded handle to make the cookie design, pressing hard.

Place your cookies on a parchment lined baking sheet and bake for 6-10 minutes.  It is not recommended to get these cookies too brown.  
 Okay here is my first tray of cookies.  You can see that with some of the cookies I pressed hard enough to create the design and with some I didn't.  So press hard to make these cookies.  After this tray I was getting the hang of it.

Here they are right out of the oven!  Aren't they gorgeous with this design pressed in them!  I just love how they turned out!  With this recipe they are crispy on the edges and soft in the center a great texture in a sugar cookie.

Here they are ready for a cup of tea and some guests!
I really loved this baking mold from Wholeport!  
Thank you Wholeport for sponsoring this post by supplying the baking mold!

Sherry

Sunday, February 13, 2011

Baking + Kids = Family Time

I am happy to join Gypsy Brocante for her Valentine's Bake Off  Challenge and Happier Than a Pig in Mud for My Favorite Kitchen Gadget Party
Jill of Gypsy Brocante asked what our inspiration was for baking?  I would have to say bloggers and family have been my inspiration.

I was inspired this weekend by Joni at Red Couch Recipes.  She posted a wonderful Maraschino Cherry Valentine Cake her mother made for her father.  I described it to my 5 yr. old and he wouldn't give up on it, he wanted me to go buy the cherries!  Click on the link for the cake and go over to Joni's and get the recipe.

And here is my second inspiration for baking, the kids.  We have a habit of discussing food and asking the kids what sounds good.  They give us lots of input.  One thing I have always enjoyed is letting them in the kitchen when they were young.  Baking is the perfect activity.

We have cleaned up the mess and moved on to our homework.  The kitchen is the perfect space for a little lesson.  Somehow I am out of wax paper so I am icing the cake with aluminum foil under it.

Joni was right this cake was wonderful!  Very rich but delicious.  Thanks for the recipe Joni, everybody gave it a thumbs up!

I was looking for recipes my Grandmother's had hand copied and to my surprise I found all of these recipes created by my oldest son.  He was in the kitchen a lot and loved to add his ideas to the weekly menu.  Here he has written out the recipe for a banana split, peanut butter and jelly, pie crust cookies, and rice crispy cookies. 

Some of my favorite kitchen gadgets are this antique rolling pin with hearts stamped on it and a pastry cutter that belonged to my Grandmother.

I also really love old pie tins with really wide edges so you can create a perfect edge to your pie crust.

Cherry pie for my Valentines.  This pie was really a cheater pumpkin eater recipe. The crust was Pillsbury and the pie filling canned.  But, I made Joni's cake totally from scratch.  I love an old fashion recipe where you have almost everything on hand.

Everyone have a fantastic Valentine's Day.  I hope you can share some time with someone you love today, maybe even in the kitchen baking.