Sunday, July 31, 2011

Bathroom Makeover Part 1

Today I am showing the before and after of our bathroom we did a few weeks ago.  I was going to wait and show it when it was decorated but, it will be awhile till we find the right accessories.   So, this is the before, last decorated in the early 90's. 

The original drywall tape was falling down and the wallpaper was peeling everywhere.  

 This area is above the tub.  When my oldest two sons were around 3 and 5 they used to throw washcloths on the ceiling and watch them stick.  They are now 16 and 18 and this ceiling has been like this a few years.
 The Process:
 So, the plan was to remove the paper and the falling drywall tape.   The holes were patched and the taping and sanding began.  It takes several layers of mudding and sanding the drywall.  My oldest son did a lot of this part of the drywall.  That helped out a lot.

 Here the popcorn ceiling was getting scraped off.  To remove you take a spray nozzle bottle with water  and dampen the popcorn ceiling then scrape off with a putty knife.  

Here we are getting ready to spray on a knockdown texture.   Everything was covered and taped with plastic.  The toilet and tub were the only two things still in the room. 

This is the wall texture mix we used to make the knockdown drywall texture.

 Practicing with the hopper to see how the drywall mix will look .  After you spray the wall texture mix on, you wait up to 30 minutes and then you knock it down with a putty knife.  

Before and Afters:

The bathroom vanity before. (I repainted it, that post here.)

 Bathroom vanity after.

Wall as you come in bath and cabinet above toilet.

 Wall now and cabinet above toilet gone.

 Ceiling above tub before.

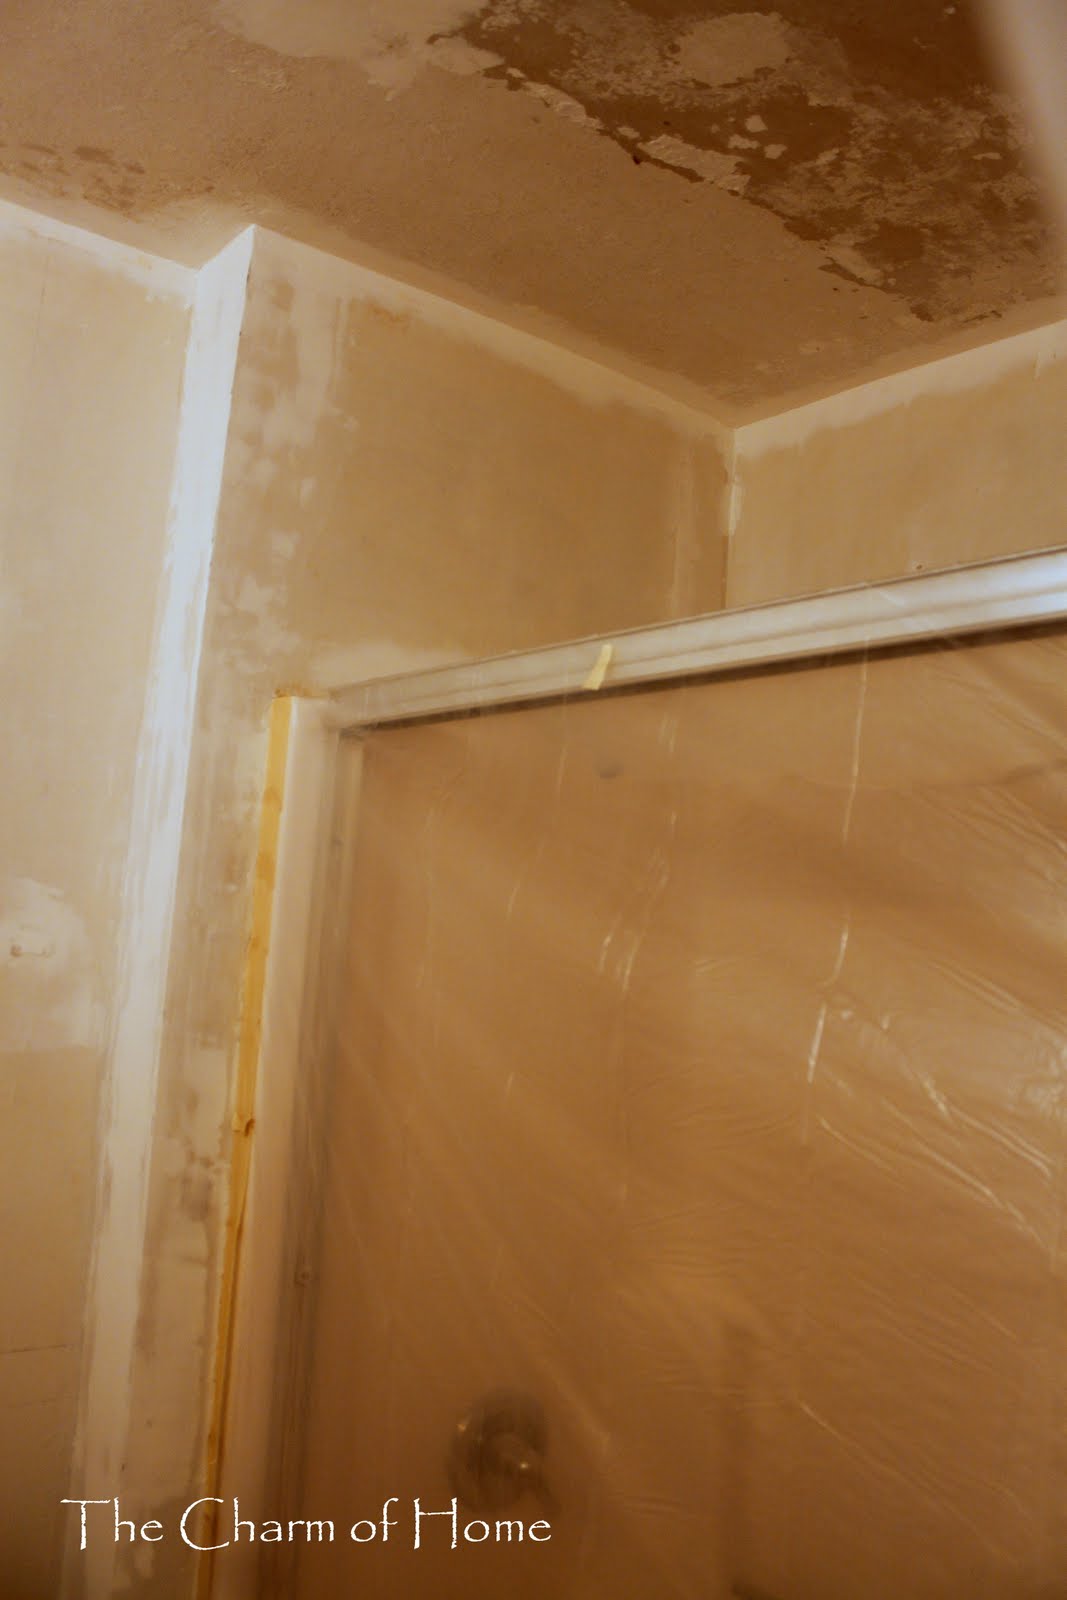
 Ceiling above tub after.
 We haven't added any accessories yet.  We need something on the wall to store items and towels.  We want to find something unique and cottage-like that will be beachy.  So Part 2 will be the decorating.  Thanks for bearing with me through that long post.   My husband and I did all of the work.  Eldest son helped with the mudding, taping and sanding of the drywall. 
I will link this up to:
Metamorphosis Monday at Between Naps on the Porch
Before and After Party  at Thrifty Decor Chick
Masterpiece Monday at Boogieboard Cottage

Thursday, July 28, 2011

Home Sweet Home # 25

Welcome to Home Sweet Home!  I have been promising a nautical tablescape for awhile.  So, today I delivered.  

The one reason I so wanted to do this table was because of this transferware.  The pattern is Fair Winds by Alfred Meakin.  This is probably a bread and butter plate.  It depicts the U.S.S. Constitution engaging a Chinese ship.  

 This is the main dinner plate.  It depicts the ship The Friendship of Salem.

The ship on the table is a Cutty Sark.  I usually have it on a ledge going down to the basement.  Some readers have asked how I dust it.  Don't tell my husband but, the can of air he keeps for the computer works perfect.

I have been seeing maps used under tablescapes lately and I love the look.  So, I used a map I picked up on vacation.

 And, since we're in the Caribbean Mate, I added a few pieces of eight.

Thanks for joining me at Home Sweet Home!
Now, I would like to feature some wonderful post from last week's Home Sweet Home.

First, Poppy over at With a Dash of Color created a nice vignette for the cloche party.  Click the link to view.

Next, Shelia over at Note Songs created another vignette that stood out.  She used the same childhood bible that I had as a child.  Click the link to view.

Rene' over at Miss Gracie's House told the story of her Victorian charmer that you don't want to miss.  Click on the link to view.

Home & Garden did a kitchen makeover.  Click the link to view.

 And last, Adrienne over at La Vie Quotidienne shows off a beautiful display that would be perfect for fall, all inspired by a French chateau, and she has pictures of the French chateau's kitchen.  Click the link to view.

Now onto today.
I will join these ladies today:
Open House Thursday at No Minimalist Here
Show and Tell Friday at My Romantic Home
Feathered Nest Fridayat French Country Cottage
Pearls and Lace Thursday  at Faith, Grace, Crafts
Seasonal Sundays  at The Tablescaper 
Tresure Hunt Thursday temporarily at From My Front Porch to Yours

Guidelines for Home Sweet Home Party:
Attention: To link up with inlinkz you must have a permalink back to this party in your post or they will not allow you to link. 
My button is on my sidebar for the party, if you want to use it.   If you are new here I hope you will become a follower.  No Etsy link ups or direct advertising, please.  Please visit some of the other blogs and get some great inspiration.  Thanks.:)
Now let's see your beautiful homes!


Tuesday, July 26, 2011

Banana Split Cake

This is an easy cake and you don't have to turn on the oven.  

Banana Split Cake

Ingredients: 
For Crust- 
16 graham crackers
1 1/2 sticks of butter
6 Tbs. sugar
For Cake-
2 eggs
2 sticks of softened butter
2 cups of powdered sugar
2-3 bananas, sliced
1 can crushed pineapple, drained
1 8 oz. tub of whipped topping
1/2 cup of chopped up nuts (walnuts or pecans are what I use)

For Crust:
Melt butter and add to crushed graham crackers and sugar.

This is how I crush my graham crackers.  I put the crackers in a gallon size zip lock bag and I use the end of my marble rolling pin to get the crackers down to size and then I roll the bag to get the crackers to crumbs.

Press mixture into bottom of 9 in.x13 in. pan.  Chill for 45 minutes.

For cake:
Beat eggs, then add butter and powdered sugar.  Beat on med-high for 15 minutes.
DO NOT COOK.  If you don't like to serve raw eggs in any dish,  then I am telling you now, they are raw in the finished dish.
Pour mixture over crust.  Put a layer of sliced bananas on top of this.
Next, put on a layer of crushed pineapple, drained.   Then put on a layer of whipped topping.  And top by sprinkling on chopped up nuts. 

For some reason I don't have a picture of a slice of this, something tells me the kids distracted me.  Put in the fridge to store.  This cake is really rich.  We usually only have it once a year for a birthday.
Recipe source: My grandmother.  It was probably originally out of a magazine.   

I will link with:
Foodie Friday  at Designs by Gollum
Wow Us Wednesdays  at Savvy Southern Style
This Chick Cooked at This Chick Cooks
Friday Food at Mom Trends 

Monday, July 25, 2011

To Dream

Today's challenge at Texture Tuesday was one near to my heart.  Our challenge was "Dream."  I created some images "poster style"  with some of my favorite dreamer's quotes.  These famous personalities knew a thing or two about dreaming and turning it into a reality for all to enjoy.

Joseph Campbell was an American mythologist, writer, and lecturer.  And was quoted as saying;
If you follow your bliss, you put yourself on a kind of track that has been there all the while, waiting for you, and the life that you ought to be living is the one you are living. Wherever you are—if you are following your bliss, you are enjoying that refreshment, that life within you, all the time.

And, also my all time favorite literary character Anne of Green Gables written by L.M. Montgomery.  Anne knew a few things about dreaming too.


All textures by Kim Klassen.
What I used:
1. love in layers with pin light48%
2. love in layers with overlay 33%.
3. love in layers with linear burn 48%.
4. love in layers with linear burn 58%.
5. stained linen with overlay 33%.
Then Kim sent a new texture that I just had to stick in (below) Dream with linear burn 65%.

Thanks Kim for your awesome textures!
I will link up with: Texture Tuesday with Kim Klassen. 
Go over and visit for some beautiful photography.
I will also link with A Return to Loveliness  at A Delightsome Life